【n8n教程】:Respond to Chat 节点,构建多轮对话 AI 助手
Respond to Chat 节点是 n8n 中用于构建交互式聊天工作流的核心组件。它允许你向用户发送消息,并可选择等待用户回复后继续执行工作流。这个节点是实现多轮对话、人工审批流程和AI 助手的关键。
适用场景:
- • 📱 AI 聊天机器人(ChatGPT、Claude 等)
- • ✅ 人工审批工作流(Human-in-the-Loop)
- • 🔄 多步骤用户交互
- • 💬 实时对话反馈系统
📚 核心概念理解
什么是 Respond to Chat 节点?
Respond to Chat 节点是一个输出节点,它在 Chat Trigger 的支持下,将信息发送回用户界面。不同于普通的数据传递,这个节点专门处理聊天交互。
关键特性:
- • ✨ 单一执行中支持多次聊天交互
- • ⏸️ 支持等待用户回复或继续执行
- • 🧠 可连接内存节点保存对话历史
- • ⏱️ 支持设置等待时间限制
工作原理流程
  用户发送消息
    ↓
Chat Trigger 触发工作流
    ↓
AI Agent/处理节点 处理
    ↓
Respond to Chat 发送回复
    ↓
等待用户回复?
    ├─ 是 → 暂停执行,接收用户输入 → 继续执行
    └─ 否 → 工作流结束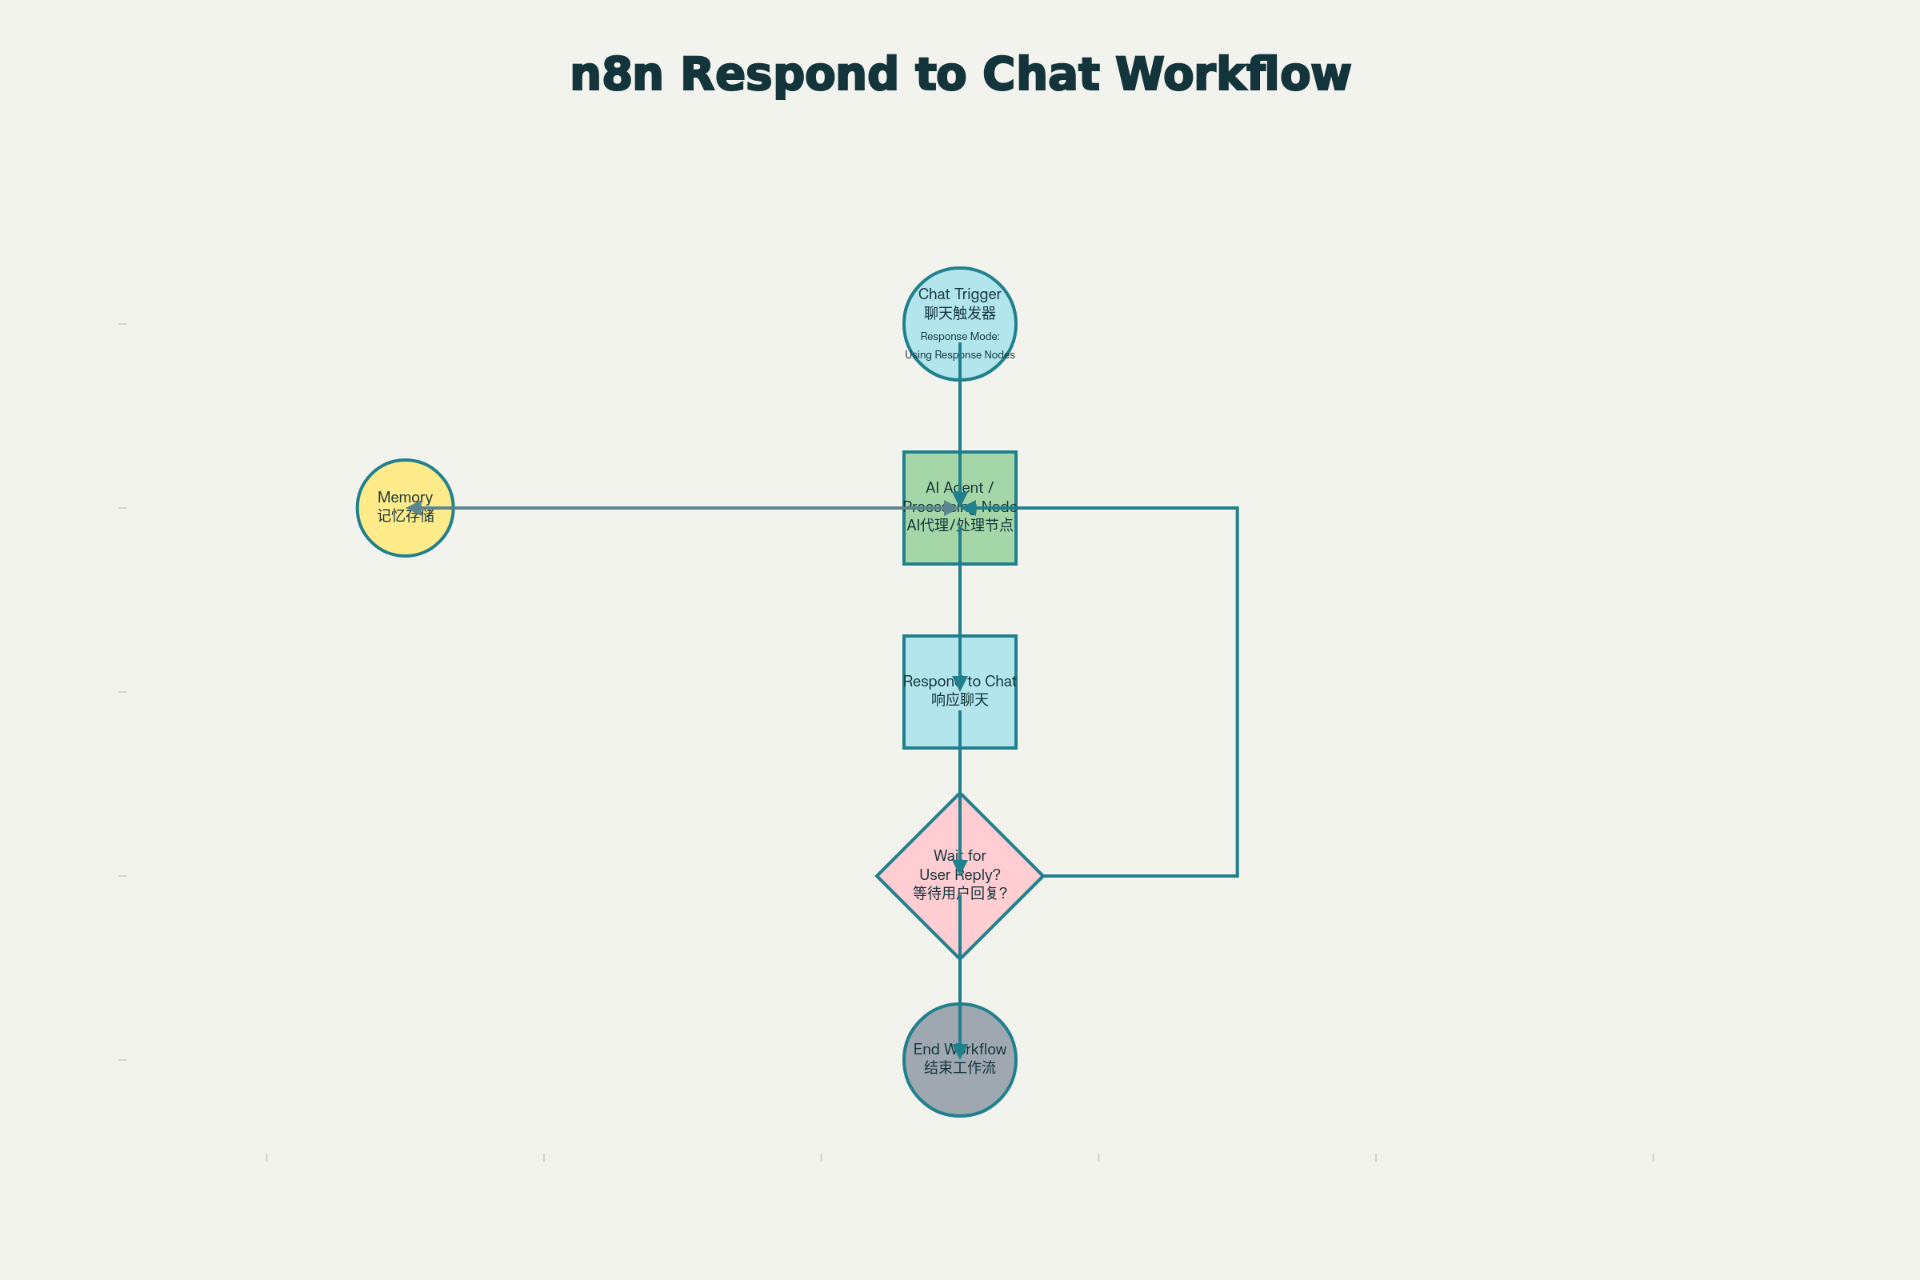
⚙️ 节点参数详解
必需参数
1️⃣ Message(消息)
- • 说明:要发送给用户的消息内容
- • 支持:
- • 纯文本消息
- • 表达式引用(如
{{ $json.text }}) - • 动态内容组合
- • 示例:
"您好!我是 AI 助手。{{ $('AI Agent').json.output }}"
高级选项
2️⃣ Wait for User Reply(等待用户回复)
控制工作流是否暂停并等待用户输入
| 设置 | 行为 | 使用场景 |
|---|---|---|
| ✅ 启用 | 工作流暂停,等待用户回复 | 多轮对话、信息收集 |
| ❌ 禁用 | 消息发送后立即继续执行 | 单向通知、自动处理 |
3️⃣ Add Memory Input Connection(添加内存连接)
连接一个内存节点以保存对话上下文
优势:
- • 💾 保留完整对话历史
- • 🔑 相同会话 ID 关联消息
- • 🧠 AI Agent 可访问完整上下文
4️⃣ Limit Wait Time(限制等待时间)
设置最大等待时间,超时后自动继续执行
配置方式:
- • 默认时间:45 分钟
- • 支持单位:分钟、小时、天
- • 超时后工作流自动恢复
🚀 前置条件
必需配置
使用 Respond to Chat 节点必须满足这些条件:
✅ Chat Trigger 节点存在
- • 工作流中必须有一个 Chat Trigger 节点
- • 不能使用其他触发器替代
✅ Response Mode 设置正确
- • Chat Trigger → Response Mode 设置为 "Using Response Nodes"
- • 不能是 "When Last Node Finishes"
✅ n8n 版本足够新
- • 需要版本 1.105.2 或更新
- • 如果看不到 "Using Response Nodes" 选项,请升级 n8n
📖 完整使用示例
示例 1:简单的 AI 助手(单轮对话)
场景:用户提问 → AI 回答 → 对话结束
步骤:
- 1. 添加 Chat Trigger 节点
- • Mode: 选择 "Hosted Chat"
- • Response Mode: 设置为 "Using Response Nodes"
- 2. 添加 AI Agent 节点
- • 连接 Chat Trigger
- • 配置 System Message(系统提示)
- • 连接到 OpenAI 或其他 LLM
- 3. 添加 Respond to Chat 节点
- • Message:
{{ $json.output }} - • Wait for User Reply: 禁用(因为不需要后续交互)
- • Message:
工作流连接:
Chat Trigger → AI Agent → Respond to Chat示例 2:多轮对话 AI 助手(带内存)
场景:用户进行多轮对话,AI 记忆之前的消息
步骤:
- 1. 配置 Chat Trigger
- • Load Previous Session: "From Memory"
- • Response Mode: "Using Response Nodes"
- 2. 添加内存节点
- • 类型:Memory Buffer Window 或 Simple Memory
- • Session Key:
{{ $json.sessionId }}
- 3. 配置 AI Agent
- • 连接到内存节点
- • 启用记忆功能
- 4. 设置 Respond to Chat
- • Message:
{{ $json.output }} - • Wait for User Reply: 启用(等待用户下一条消息)
- • Add Memory Input Connection: 启用
- • 连接到内存节点
- • Message:
完整工作流:
  Chat Trigger
    ↓
Memory ─→ AI Agent ─→ Respond to Chat
    ↑_________________↓
      (循环连接内存)
示例 3:人工审批流程(Human-in-the-Loop)
场景:AI 生成内容 → 用户审批 → 继续处理
步骤:
- 1. 第一个 Respond to Chat:发送 AI 生成的草稿
  Message: "您好,我为您生成了以下文本:\n\n{{ $('AI Agent').json.output }}\n\n请确认是否满意?"
Wait for User Reply: 启用 - 2. 处理用户回复
- • 使用 IF 节点判断用户是否批准
- • 批准 → 继续处理
- • 拒绝 → 重新生成
- 3. 第二个 Respond to Chat:发送最终结果
  Message: "感谢您的反馈!内容已发送。"
Wait for User Reply: 禁用
💡 实战技巧
技巧 1:动态消息生成
使用表达式动态构建消息内容:
  // 组合来自多个节点的信息
{{ "用户问题:" + $json.question + "\n\n" + "AI回答:" + $('AI Agent').json.output }}
技巧 2:条件消息发送
在 Respond to Chat 前使用 IF 节点:
  IF 节点判断条件
├─ True → Respond to Chat(发送特定消息)
└─ False → 其他处理
技巧 3:处理等待超时
启用 Limit Wait Time,在用户长时间不回复时自动处理:
  启用 Limit Wait Time
设置为:24 小时
超时后工作流继续执行,可发送提醒消息。
技巧 4:保存对话历史
使用内存节点保存所有对话,便于数据分析:
Memory Input Connection → 数据库存储(Airtable/Google Sheets)⚠️ 常见错误与解决方案
| 错误信息 | 原因 | 解决方案 |
|---|---|---|
| "Response Mode must be set to Using Response Nodes" | Chat Trigger 配置错误 | 检查 Chat Trigger 的 Response Mode 设置 |
| 找不到 "Using Response Nodes" 选项 | n8n 版本过旧 | 升级 n8n 到 1.105.2+ |
| Respond to Chat 节点不显示 | 缺少 Chat Trigger | 先添加 Chat Trigger 节点 |
| 消息显示为 JSON 格式 | 返回的是对象而非字符串 | 使用表达式提取文本:{{ $json.text }} |
| 等待超时后仍未继续 | 没有配置超时时间 | 启用 Limit Wait Time 选项 |
📝 完整可执行工作流代码
以下是一个开箱即用的多轮对话 AI 助手工作流,可直接导入 n8n:
  {
  "name": "多轮对话 AI 助手工作流",
  "nodes": [
    {
      "parameters": {
        "mode": "hosted"
      },
      "id": "chat-trigger-node",
      "name": "Chat Trigger",
      "type": "n8n-nodes-langchain.chatTrigger",
      "typeVersion": 1,
      "position": [100, 200],
      "disabled": false
    },
    {
      "parameters": {
        "hasSystemMessage": true,
        "systemMessage": "你是一个友好的 AI 助手。帮助用户回答问题和解决问题。保持对话自然流畅。",
        "hasMemory": true,
        "hasInputData": true,
        "options": {}
      },
      "id": "ai-agent-node",
      "name": "AI Agent",
      "type": "n8n-nodes-langchain.agent",
      "typeVersion": 1,
      "position": [300, 200],
      "disabled": false
    },
    {
      "parameters": {
        "message": "={{ $json.output }}"
      },
      "id": "respond-to-chat-node",
      "name": "Respond to Chat",
      "type": "n8n-nodes-langchain.respondToChat",
      "typeVersion": 1,
      "position": [500, 200],
      "disabled": false
    },
    {
      "parameters": {
        "metadata": {
          "description": "存储对话上下文和会话信息"
        }
      },
      "id": "memory-node",
      "name": "Memory",
      "type": "n8n-nodes-langchain.memory",
      "typeVersion": 1,
      "position": [300, 350],
      "disabled": false
    }
  ],
  "connections": {
    "Chat Trigger": {
      "main": [
        [
          {
            "node": "AI Agent",
            "type": "main",
            "index": 0
          }
        ]
      ]
    },
    "AI Agent": {
      "main": [
        [
          {
            "node": "Respond to Chat",
            "type": "main",
            "index": 0
          }
        ]
      ]
    },
    "Memory": {
      "main": [
        [
          {
            "node": "AI Agent",
            "type": "main",
            "index": 0
          }
        ]
      ]
    }
  },
  "active": true,
  "settings": {
    "executionOrder": "v1"
  },
  "versionId": "1.0"
}使用步骤:
- 1. 复制上面的 JSON 代码
- 2. 在 n8n 中新建工作流
- 3. 点击右上角 "..." → "Import from File"
- 4. 粘贴 JSON 代码
- 5. 配置 OpenAI 或其他 LLM 凭证
- 6. 激活工作流
🎓 进阶学习
与 Chat Trigger 的深度集成
Respond to Chat 必须与 Chat Trigger 配合使用。记住:
- • Response Mode = "Using Response Nodes" 时,Respond to Chat 才生效
- • 一个工作流可以有多个 Respond to Chat 节点
- • 每个 Respond to Chat 都会创建一次对话轮次
流式响应(Streaming)
较新版本支持实时流式响应:
  Chat Trigger → Response Mode: "Streaming"
    ↓
AI Agent → Enable Streaming: 开启
    ↓
Respond to Chat(自动流式输出)
用户会实时看到 AI 逐字生成的回复。
与 Respond to Webhook 的区别
| 特性 | Respond to Chat | Respond to Webhook |
|---|---|---|
| 适用场景 | 聊天交互 | 通用 Webhook |
| 内存支持 | ✅ 原生支持 | ❌ 需要手动管理 |
| 多轮交互 | ✅ 原生支持 | ⚠️ 需要会话管理 |
| 响应格式 | 纯文本消息 | JSON 对象 |
引用链接
[1] 官方文档: https://docs.n8n.io/integrations/builtin/core-nodes/n8n-nodes-langchain.respondtochat/
[2] n8n系列教程: https://www.undsky.com/blog/?category=n8n%E6%95%99%E7%A8%8B